Bose L1-II / B1 – line array sub combination

Bose L1-II & B1 sub

While doing some recording in Steamboat Springs Colorado, I had the opportunity to measure a Bose L1 line array and B1 sub.

Bose L1s with B1 bass cabinet

Bose L1s with B1 bass cabinet – owners guide

The rig sounds pretty good. The blue trace below is the L1-II system without the B1 sub plugged in. The green trace is with the B1 sub plugged in.

Bose L1-II & B1 sub flat

I’m curious about the peak just above 250 and the hole below 250. Maybe the 24 x 3″ speakers in the line array are being high passed to protect them. Note that without the sub, there is nothing below 250hz and with the sub, there is excess low end. Also note that the 3″ speakers seem to naturally roll off around 8k. I was curious how the rig might respond to eq. Here is the curve I came to:

Bose L1 & B1 EQ curve

EQ result is the pink trace:

Bose L1 & B1 with and without EQ

You will notice the HF shelf I used really doesn’t do very much. The 3″ speakers just don’t go up that high. I think it sounded a better with that slight boost but it’s really not necessary. The clarity of this system is surprisingly good. The strange thing going on at around 250 didn’t respond well to my EQ adjustment. Could be a room issue. My coherence trace suggested the issue wasn’t eq-able but I gave it a shot anyway. The important eq adjustment I would repeat is the LF cut centered at around 70hz to balance the sub with the line array. If parametric eq isn’t available, it should be possible to use a high wattage resistor to reduce the sub volume by a few db passively. One could build an assortment of inline speakon to speakon adapters that would allow for adjustment of the B1 sub level based on the acoustic environment. For example, if the rig is in a corner you may have even more excessive LF. If outdoors you may need to run the sub wide open.

Meyer Sound – SIM 3 eBay sighting

Solotech Meyer Sound SIM 3 rig 1

I recently came across this Meyer Sound SIM 3 rig on Ebay. It had already sold but the listing gives a glimpse of how valuable a rig still is and shows some of the accessories that can be added to a base system to expand the number of inputs and outputs that can be compared:

QUOTE:

“This listing is for a used Meyer Sound SIM 3 audio analyzer system in perfect condition. The system includes one(1) SIM 3 3022 unit, one(1) SIM 3 3088 multi-channel line switcher and one(1) SIM 3 3081 8-channel mic switcher. Also provided is two 10’ DB-25 to XLRF and 2 10’ DB-25 to XLRM cables, Powercon connectors, a 2U drawer and a 6U rack case. This is a self-contained system that doesn’t require a computer as the proprietary software is running from the hardware. You only need to plug a VGA monitor on the back of the 3022 unit and a mouse on the front. The perfect solution for anybody wanting a self-contained portable system not tied to a computer.”

Solotech Meyer Sound SIM 3 rig 2

Solotech Meyer Sound SIM 3 rig 3

Directional Sound

Speaker Diameter - Dispersion ChartDriver Diameter and Piston Beaming Frequency

Here is a quote from “Loudspeaker Design Cookbook – 7th Edition (Vance Dickason) taken from page 8:

“Cone Directivity – As frequency increases all speakers become more directive and the high frequencies begin to “beam” like the light from an automobile headlight. At frequencies where the wavelength of sound (wavelength being equal to the speed of sound divided by the frequency = C/F, i.e. 1kHz has a wavelength of 1.13 feet) is large compared to the circumference of the cone (about 3 times the diameter), the radiation is spherical. As the frequency increases to the point where wavelength is equal to the circumference of the driver or smaller, the radiation patter becomes progressively narrower. The chart in FIG. 0.14 gives the =6db off-axis points for different diameter speaker diaphragms (after Daniels with changes, JBL Pro Soundwaves, Fall 1988)

WIKI – Directional Sound

QUOTE:

“The larger the speaker array, the more directional, and the smaller the size of the speaker array, the less directional it is. This is fundamental physics, and cannot be bypassed”

This is a link from that page and explains some higher reasoning behind the concept if you’re the type of person who can understand such things:

WIKI – Huygens Fresnel Principle

Steely Dan in Dallas this weekend

It appears that sound veteran Mark Dowdle will be @ FOH this weekend for Steely Dan’s concert at Gexa Amphitheater in Dallas Texas.

What does Steely Dan’s engineer use to check the PA system?

Find out here:

Pro Sound News – Pursuit Of Perfection: Concert Sound For Steely Dan’s Summer Tour

QUOTE:

“As with most FOH engineers of Dowdle’s vintage and background, Steely Dan’s catalog and Donald Fagen’s solo album The Nightfly are standards for tuning and evaluating sound systems. To answer the perennial question, “what’s used on a Steely Dan tour to tune the PA?” he replies that he uses Steely Dan live every day during sound check.
But prior to that, he plays Thomas Dolby’s “My Brain is Like a Sieve” from Aliens Ate My Buick and Frank Zappa’s “Lucielle” from Joe’s Garage, which has a very natural sounding vocal. A Shure KSM9 condenser mic then helps in the fine-tuning of its response.”

END QUOTE:

Funny. Aliens Ate My Buick is easily in my top 10 recordings of all time and I used it just last weekend in Allentown PA to check my PA.

Jensen Transformers acquired by Radial Engineering

Surprisingly I just got an email from Bill Whitlock of Jensen Transformers in response to an email I sent to Jensen probably a year ago about Pin 1 Problems. He explained to me that Radial Engineering recently acquired Jensen… You can read articles about Jensen and the acquisition here:

FOH Magazine – Jensen Transformers’ 40th Anniversary

CEPRO – Jensen Transformers acquired by Radial Engineering

In the meantime, the reason I was writing Jensen originally was to request permission to share an article Jensen produced regarding what was coined a “PIN 1 PROBLEM” and for which I secured and designed this website more than a decade ago:

pin1problem.com

Expect more regarding this matter as Bill and I exchange information on the topic.

A/B Sound Systems – 2 of everything

WIKI – A/B Sound System

QUOTE:

“An A/B Sound System is a type of Sound reinforcement system or Public address system. Unlike a more typical sound reinforcement system, an A/B Sound System provides two electrically isolated signal paths from microphone to speaker, resulting in a system where signals from two microphones only interact acoustically and never interact electronically. This is accomplished by placing two separate loudspeakers at each speaker position and feeding the two speakers separate signals from separate microphones.[1] The purported benefit of such a system is a reduction in phase cancellation and intermodulation distortion, and an improvement in speech intelligibility when two microphones are used simultaneously. A/B Sound Systems are unusual because they require double the speakers and therefore have double the cost.”

The first time I ever heard an A/B system was on Disney’s first touring production of Lion King @ Bass Hall in Fort Worth. During the sound check and went to the farthest balcony to listen and was amazed that I could understand every syllable. When two actors were speaking, each one’s voice was routed to a different set of speakers covering the same zones. I spoke with the audio engineer at the time and learned that the choir was coming from a different PA and the orchestra from another.

Speaking of Lion King, the Broadway show as designed by industry heavy Tony Meola. Here is a Meyer interview with the man himself from 2002.
Meyer Sound – Interview with sound designer Tony Meola

Here is a run gear rundown and interview with Tony regarding the rig itself.
Meyer Sound – The Lion King on Broadway

Measurements affected by mic clip orientation and stand position


I just came across an interesting article called,

Meyer Sound – Frequency Response Measurements and the
Meyer Sound HD‑1 High Definition Audio Monitor

A truly fascinating read but the following diagram on page 7 really stuck out:
Meyer Sound - Amplitude errors introduced by various test microphone mounts

We must be careful about how we place our mic clip on our measurement mics, what type of clip we use and where our stand is.

This reminds me of a conversation I had with Eric Blackmer of Earthworks Audio years ago. He explained that there is a measurable different between locating the mic clip at the very back end of the mic and forward closer to the tip. I hadn’t really given this idea much thought but the diagram reveals just how important the clip type, orientation, mic stand type, boom arm angle and placement really is.

In fact Earthworks staff wrote a paper that explains how they measure their mics:

How Earthworks Measures Mics

Here is a relevant quote from the white paper on PDF page 5:

” Attention must also be given to the microphone’s mounting.
Microphone clips should be placed as far from the tip as possible. I even use an absorptive material around
the microphone stand to eliminate reflections. Although Earthworks microphones have the stepped shape,
the step is very gradual and the reflections due to its presence are about 40 dB under the signal (actual
measurement).”

The white paper goes on to state the following on page 6:

“Many measurement microphones have some kind of slotted cap covering the diaphragm. This cap is often
used to shape the frequency response, as well as being a protective cover. Unfortunately, it is seldom a
minimum phase equalizer, and tends to degrade the original impulse response of the microphone element
by creating a complex set of reflections. In addition, many measurement microphones have an oversized
rear chamber with significant internal echoes.
These echoes make impulse response anomalies even worse. All this results in time-domain measurements
being seriously compromised. We have studied 1/4″ measurement microphones by B&K and Gefell, and
concluded that the only meaningful way to use them was to take the caps off. Then, even the
exposed threads had an influence on the response! And I had to cover the threads to bring the
measured responses closer to those specified by their manufacturers. The reason for this is that the
supplied response curves of the microphones are not actual acoustic measurements. The manufacturers use
an electrostatic actuator and a correction curve for presumed effect of microphone shape to obtain a
response chart for their microphones, a method that has no means to reveal the influence of anomalies in
the external acoustical structure. It’s a bit like deriving the response of a finished loudspeaker from the
responses of its components instead of measuring it.”

Take a look at Earthworks measurement mic. No near reflections with that one 🙂

Alex Khenkin - How Earthworks Measures Microphones

Come to find out the original source of the diagram referred to in the Meyer Sound document is taken from a B&K article published in 1985. The article starts on page 32 (PDF 34) and ends on page 39 (PDF 41)
Validity of Intensity Measurements: Influence of Tripods and Mic Clips , Brüel & Kjaer Technical Review no. 4 (1985)

Here are some additional diagrams that should drive the point home…
Screen Shot 2015-07-13 at 11.39.17 PM

Screen Shot 2015-07-13 at 11.39.38 PM

Screen Shot 2015-07-13 at 11.39.55 PM

Screen Shot 2015-07-13 at 11.40.27 PM

Screen Shot 2015-07-13 at 11.40.13 PM

Screen Shot 2015-07-13 at 11.40.46 PM

I just ordered one of these and will do some experiments myself and then report back with my results.

Shure G18-CN

Dave Rat demonstrates a little known but very common loudspeaker distortion

Dave Rat – Demonstrates a Little known but very common Loudspeaker Distortion

This concept makes me lose sleep at night. This is solid justification for using different PA speakers to reproduce different material. For example having a PA for amplifying the band and another PA for amplifying the vocals. We should all be thinking about how low frequencies are affecting the rest of our frequency response.

I like Dave Rat. He is willing to invest his time in better and better sound and take what he learns from his own experimentation and incorporate it into his work flow.

His current Red Hot Chili Peppers PA is proof.

QUOTE: “With the double hung PA concept I was able to implement and demonstrate that having instruments and vocals coming from separate sources is not only an advantage for stage monitors but can be applied on a grand scale. Also, since I could move any instrument to either the outer or inner PA in real time, I became very aware of the important advantages gained in using separately located sources. With monitors, I would find out after the show if separate sourcing worked, with the double hung main system, I was in the listening position personally (along with 20,000 of my best friends) and could hear the immediate and direct effect.”

Dave Rat double hung PA

What Dave is doing with his PA system x 2 is called an A/B sound system and is sometimes used on Broadway shows. Dave may be the first rock & roll mix engineer to take the leap though.

WIKI – A/B Sound System

QUOTE:

“An A/B Sound System is a type of Sound reinforcement system or Public address system. Unlike a more typical sound reinforcement system, an A/B Sound System provides two electrically isolated signal paths from microphone to speaker, resulting in a system where signals from two microphones only interact acoustically and never interact electronically. This is accomplished by placing two separate loudspeakers at each speaker position and feeding the two speakers separate signals from separate microphones.[1] The purported benefit of such a system is a reduction in phase cancellation and intermodulation distortion, and an improvement in speech intelligibility when two microphones are used simultaneously. A/B Sound Systems are unusual because they require double the speakers and therefore have double the cost.”

The first time I ever heard an A/B system was on Disney’s first touring production of Lion King @ Bass Hall in Fort Worth. During the sound check and went to the farest balcony to listen and was amazed that I could understand every syllable. When two actors were speaking, each one’s voice was routed to a different set of speakers covering the same zones. As I recall, the choir was coming from a different set of speakers and the orchestra from another.

Speaking of Lion King, the Broadway show as designed by industry heavy Tony Meola. Here is a Meyer interview with the man himself from 2002.

Meyer Sound – Interview with sound designer Tony Meola

How to test an XLR cable

It may seem trivial to test a common mic cable but there is more to a mic cable than 3 pins. Depending on how those pins are connected on both ends, you will either have good audio, no audio, bad audio or low level audio. A incorrectly wired cable might be acting like an antenna.

Meyer Sound has provided us with a SIM3 procedure for doing just that.

SIM3 measure XLR cables

Not all of us have a SIM3 machine sitting around in which case the Rat Sound – Rat Sniffer / Sender Cable Test Kit is a good option instead.

The RAT SOUND – XLR Sniffer / Sender Cable Tester kit

Rat Sound - XLR Sniffer / Sender Cable Tester kit

SoundTools – XLR Sniffer / Sender kit

I have 4 of these floating around. Since the two parts can be located away from each other, it makes it simple and fast to test things between the stage and FOH without running a long XLR cable which would be necessary with other cable testers. A set cost around $50. Well worth it.

This is a guide to what the 3 LED lights indicate:

Rat Sniffer - key

Here is a youtube video about the Rat Sniffer / Sender with Dave Rat.

Dave Rat – Rat Sniffer & Sender – A remote end XLR Cable Tester

Classical Mystery Tour – Miller Symphony Hall / Allentown PA part 3

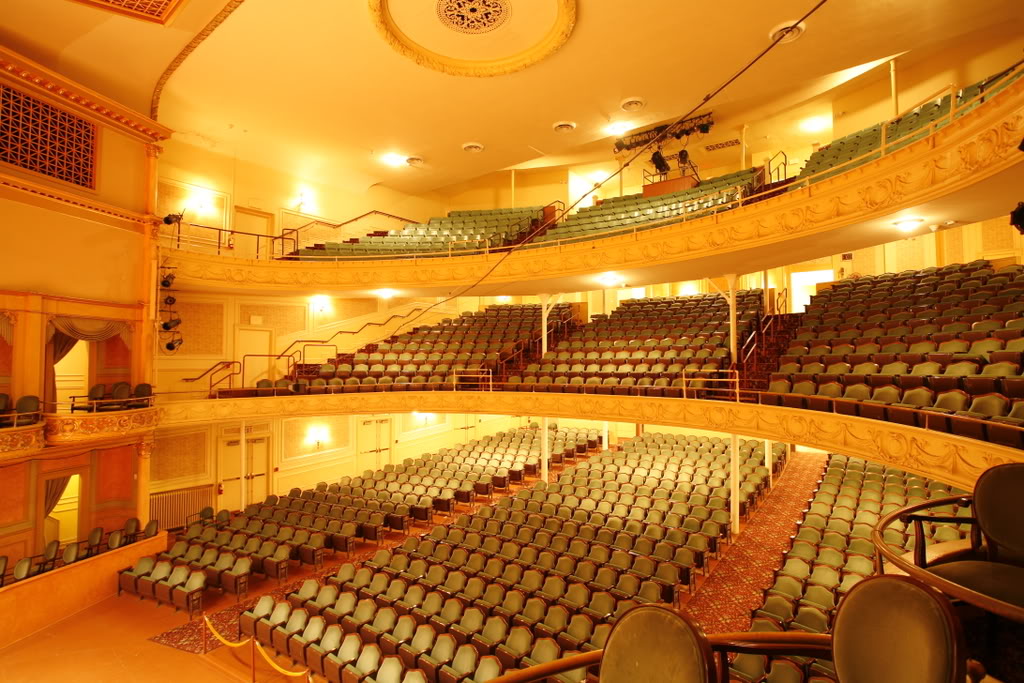
The Miller Symphony Hall is an interesting venue. Starting out as a farmers market and becoming a theater in 1899, it was one of the leading burlesque halls in the US in the early 1900s.

Miller Symphony Hall Interior

Miller Symphony Hall Interior balcs

WIKI – Miller Symphony Hall

Miller Symphony Hall

Some history about the venue

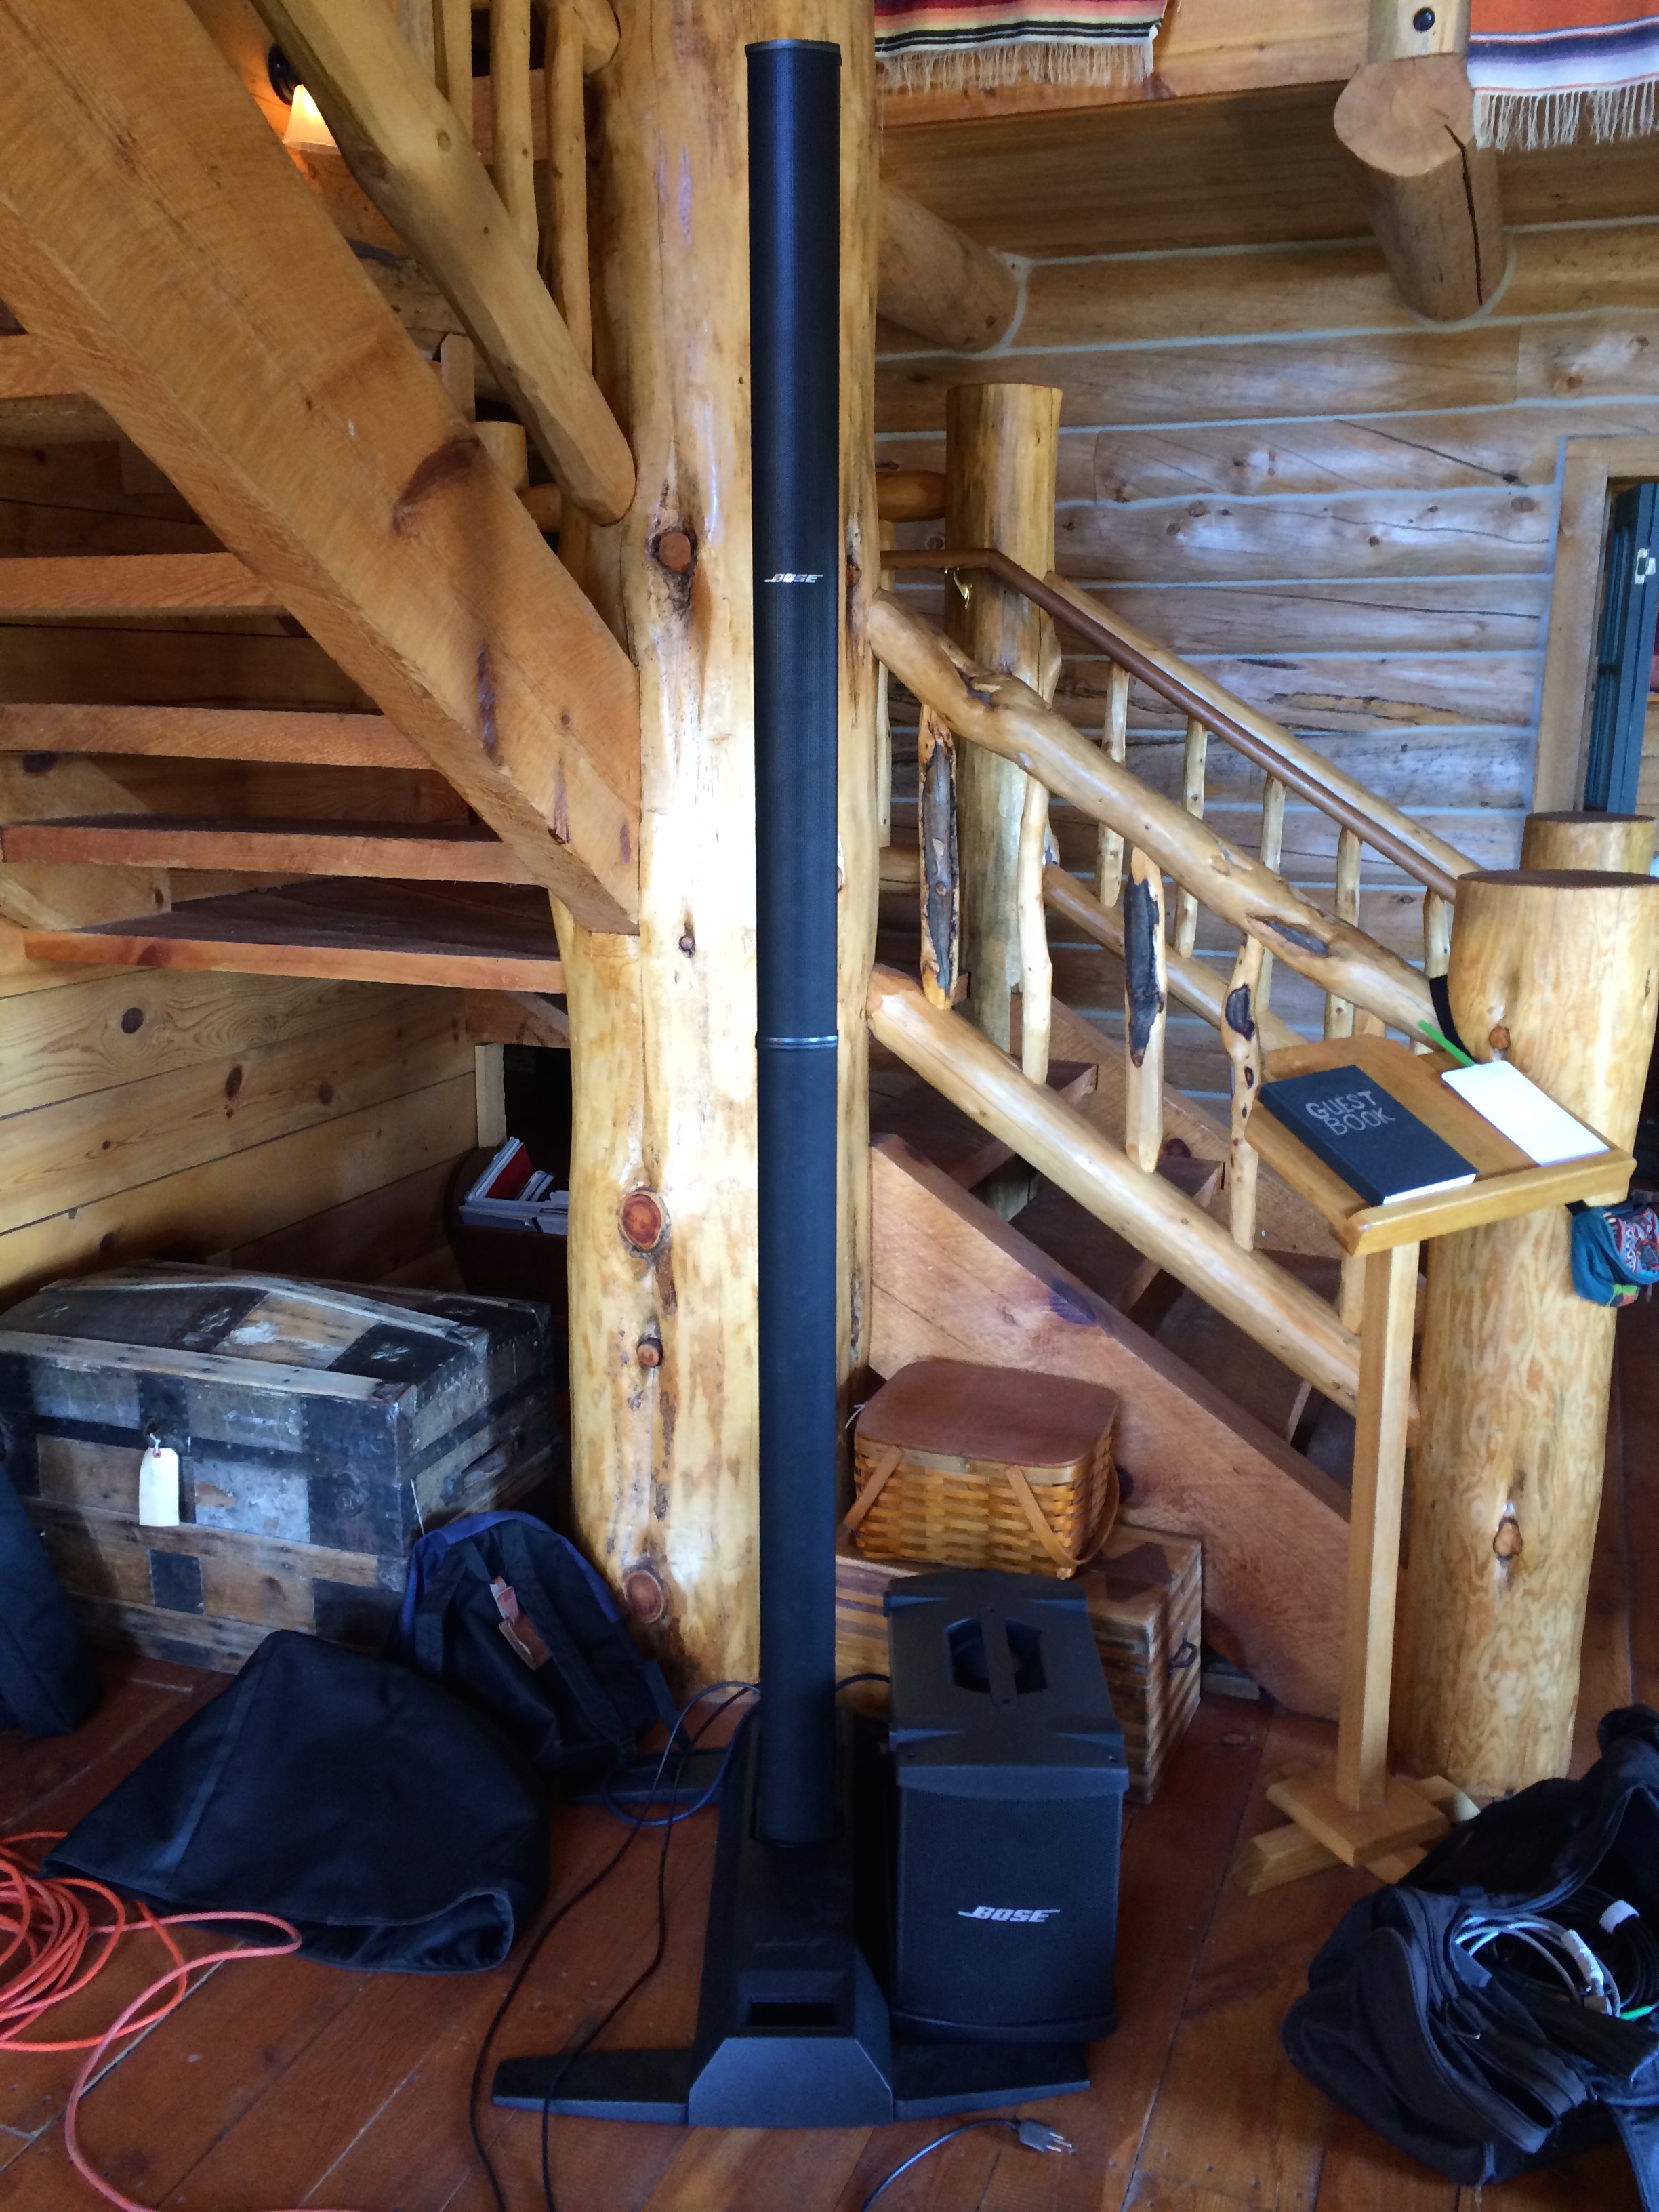
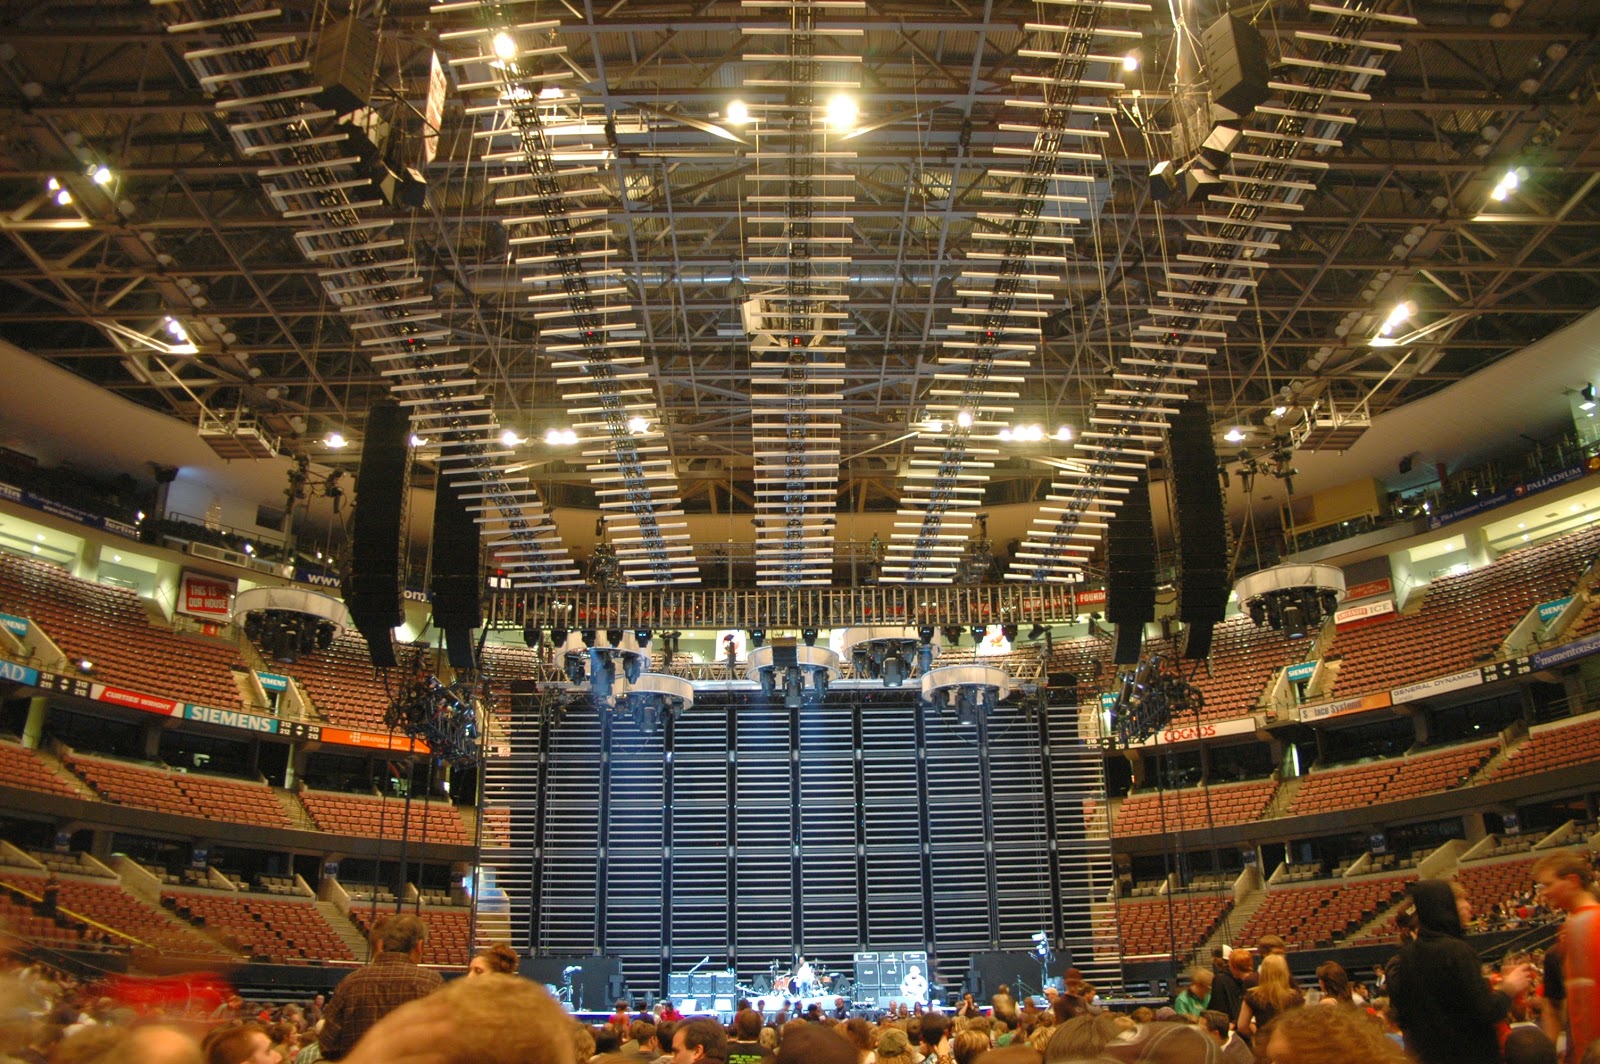
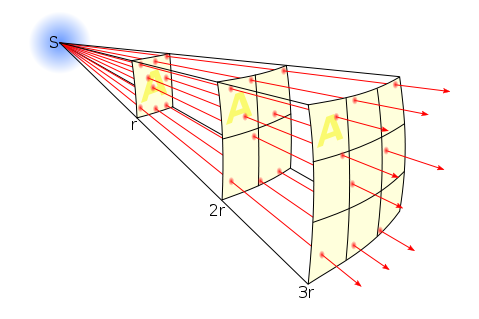
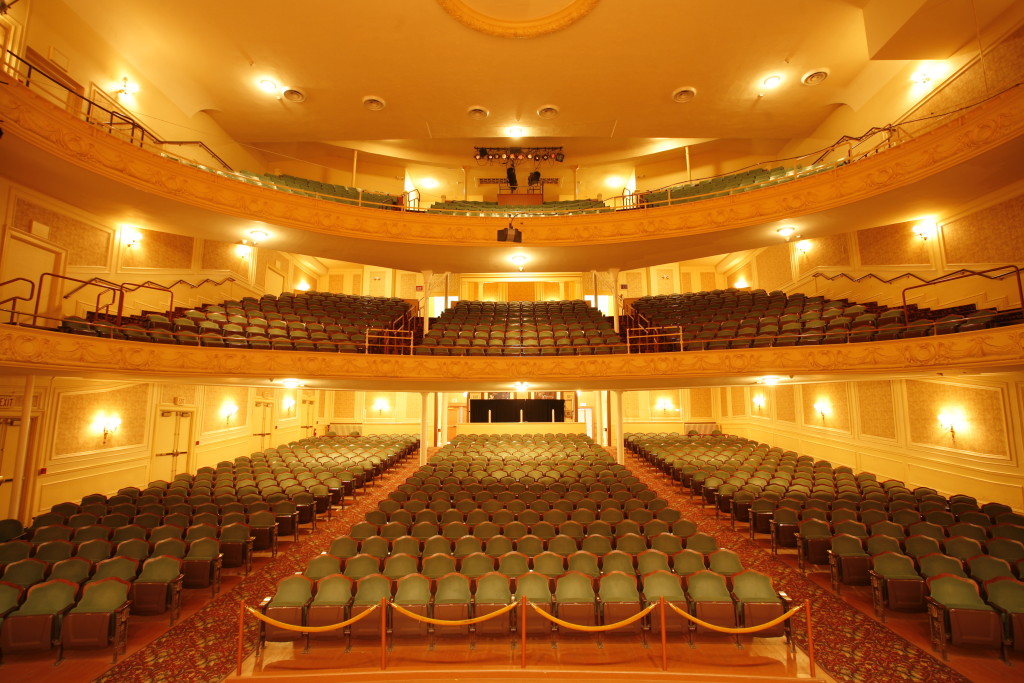
As the photos above reveal, in addition to the orchestra level, there are (2) relatively deep balconies. There are no rigging points to hand a PA over the stage. Consequently my biggest challenge was no running the PA too loud for those up close. Anytime you have a ground stacked or stage stacked PA, the people up close to the stage are going to be subjected to excess volume if the level is at show volume in the rear of house seats. That is physics and there is no way around it. Ideally a main PA is flown which evens out the volume discrepancy. In the case of the Miller Symphony Hall, there are no rigging points.

What to do? We would need to under balcony speakers and over balcony speakers to allow us to turn down the main PA and make up the different. This may actually be possible thanks to the lighting positions at each level.

My ultimate goal is never to hurt anyone ears and to avoid sound complaints. I’d rather get a “it’s not loud enough” complaint than “it’s too loud” complaint. In this case, I went out of my way to make sure the symphony and venue staff understood my concerns, understood what I could and couldn’t do and to know that I was receptive to any complaints at any time. I even met with the head ushers to explain what to expect and what to do if someone complained.

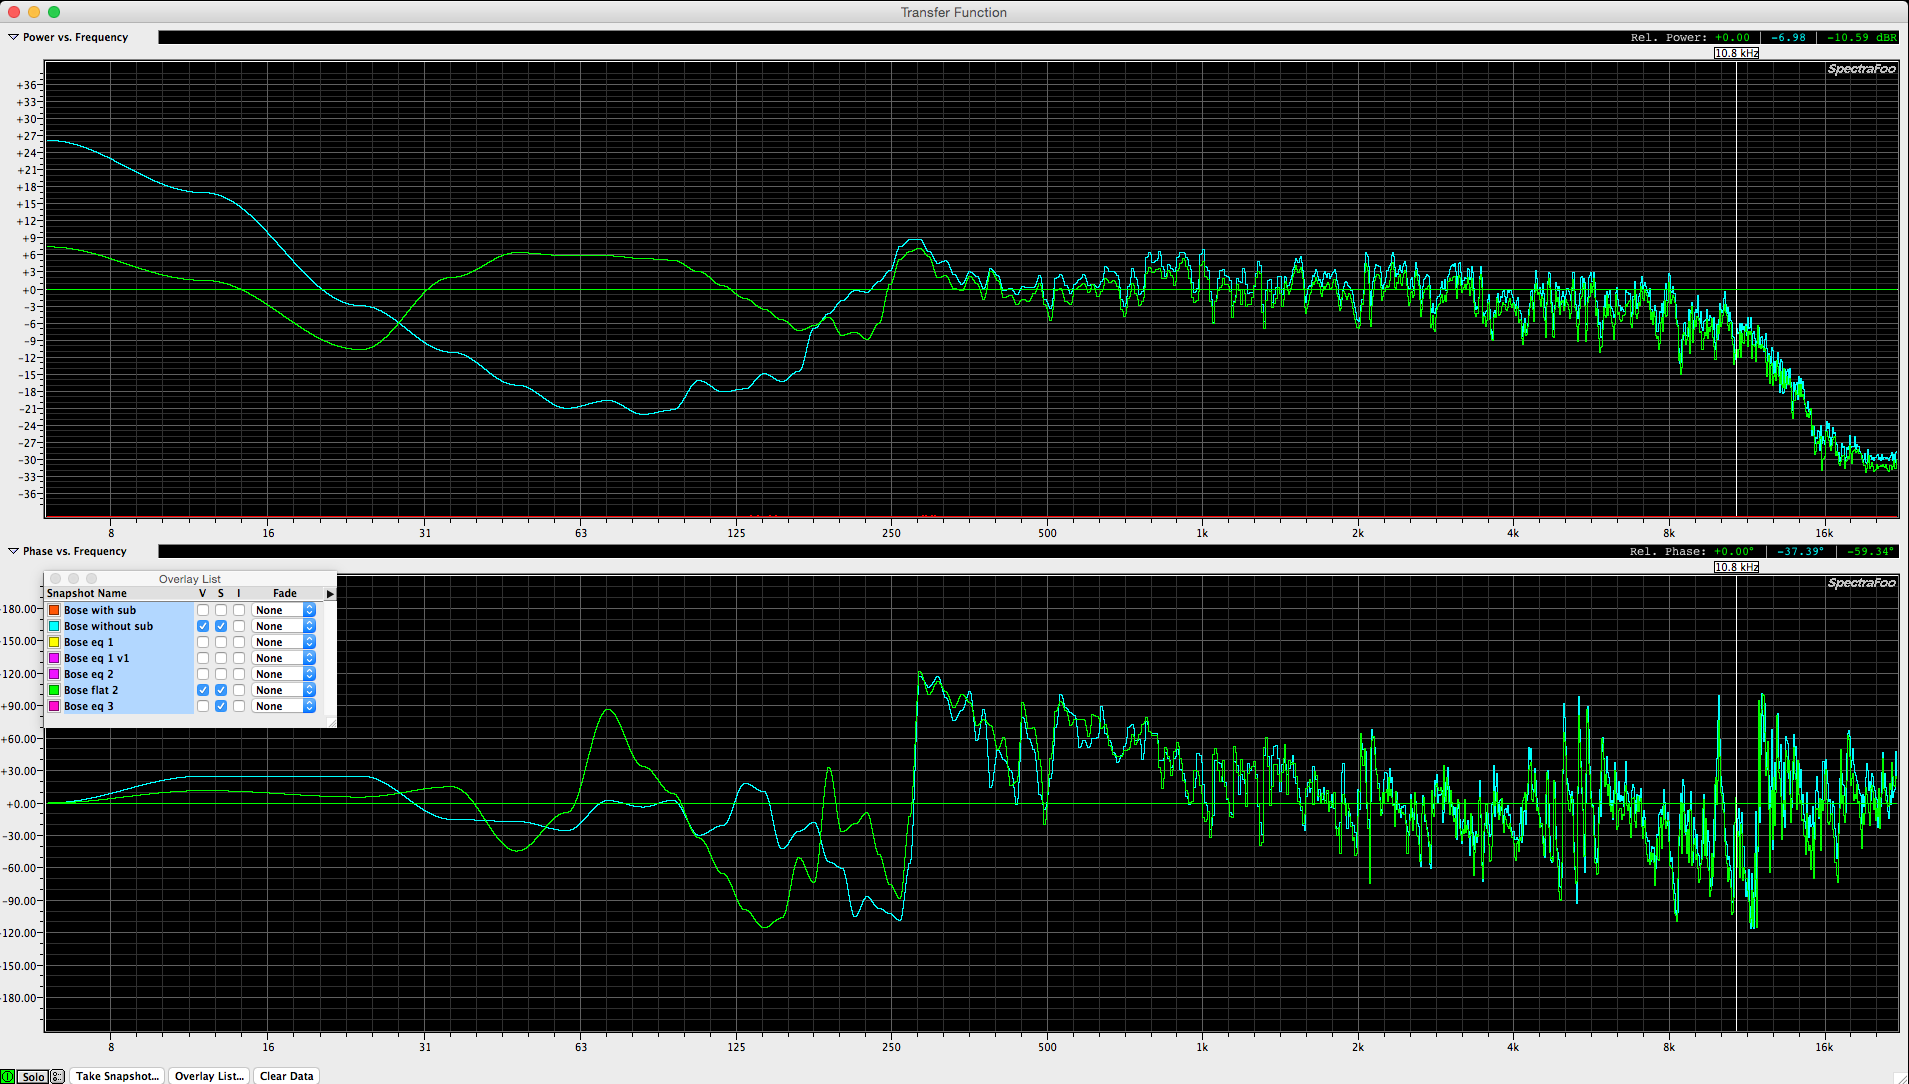
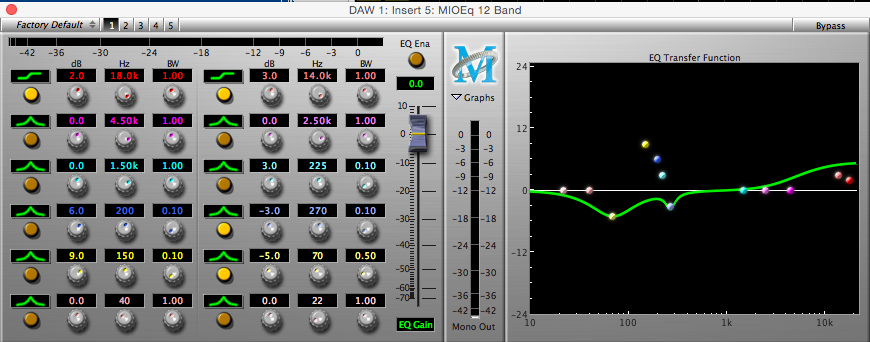
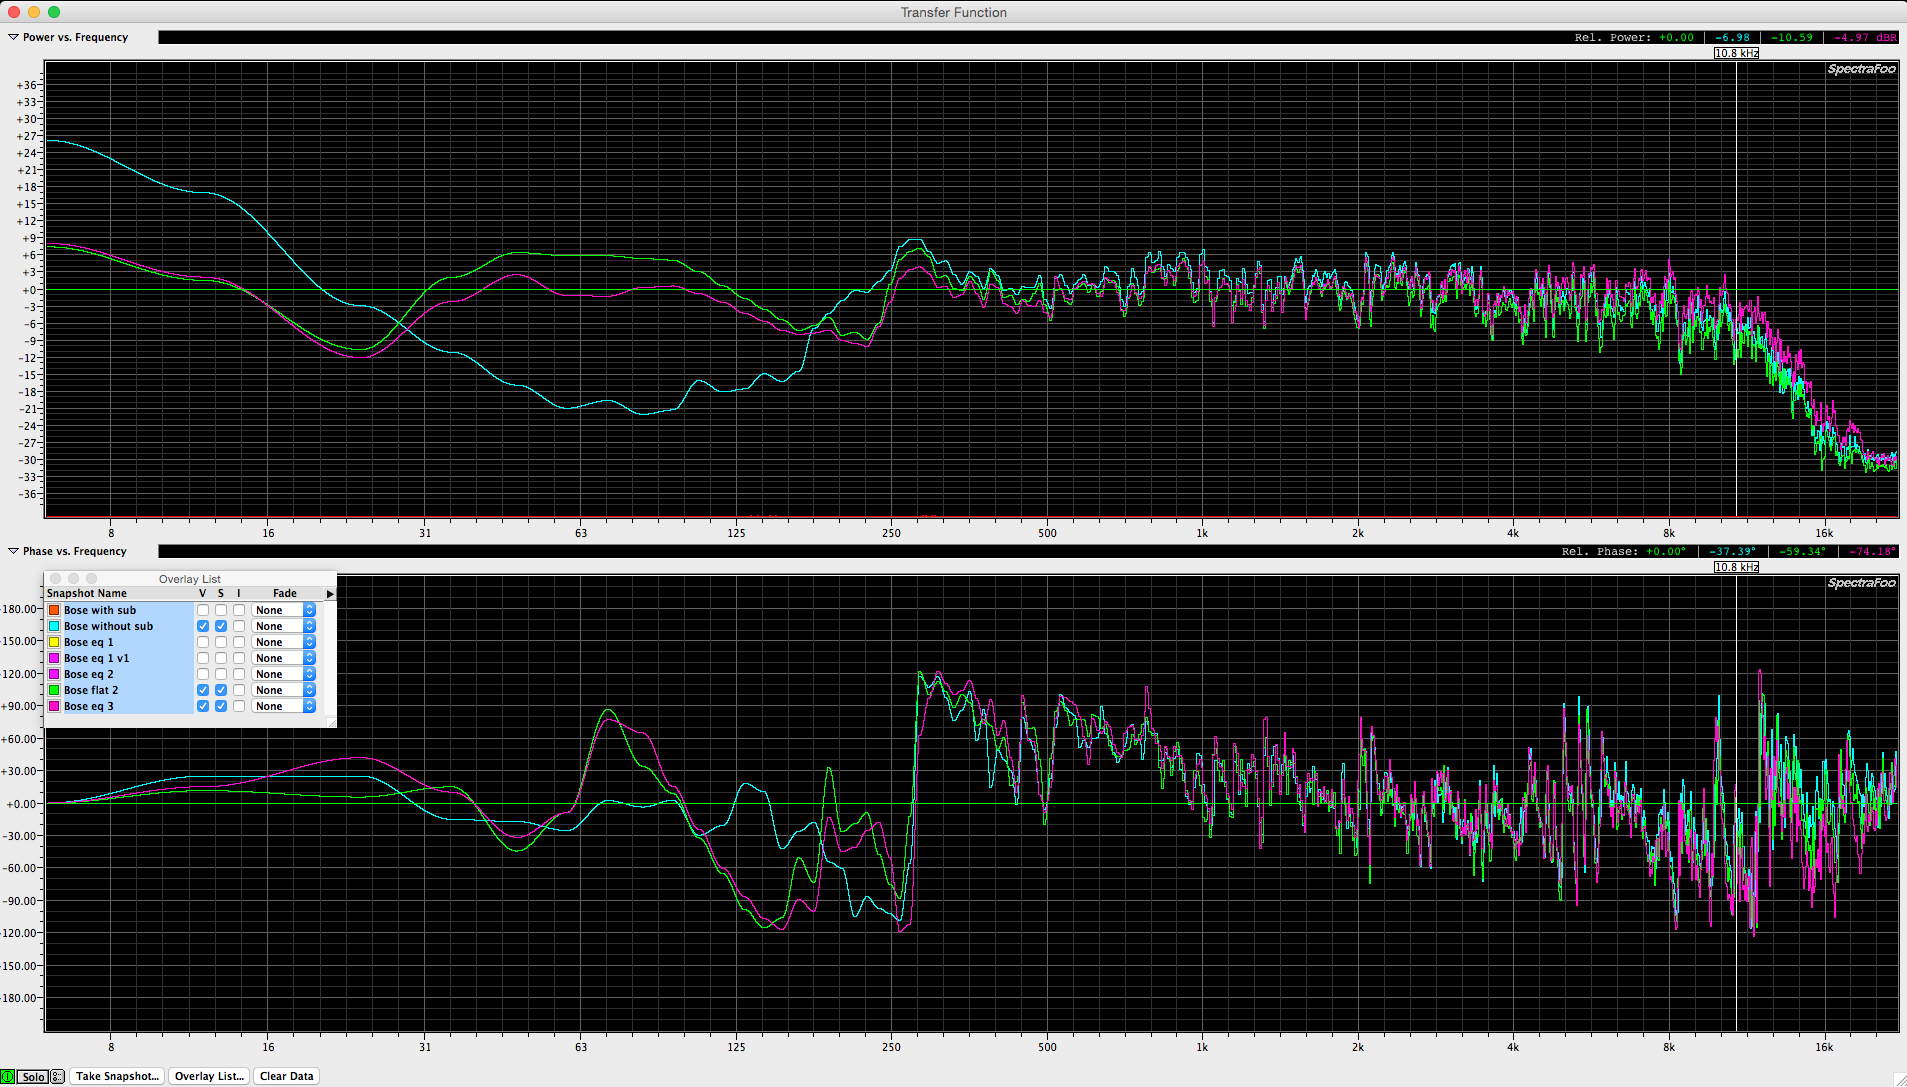
The fact that wasn’t a single reported sound complaint can be attributed to a few things. A PA that was optimized for the room (linear frequency response to the best of my ability) and the choice to leave everything a little on the dull side where I was standing. It’s counter intuitive to mix where you can’t really hear clearly what is going on but that was necessary in this case. I made probably 50 trips to the front row orchestra level to get a sense of how my mix would translate up close to the PA during the band sound check and orchestra rehearsal. Two things were obvious issue. Loud up close compared to the mix position and more present. So over the course of the sound check and orchestra rehearsal, I cut some 3150k from pretty much every channel. In hind site, I could of done the same thing at the stereo L/R buss but I never know what is needed when I start and after a while I’ve tweaked everything at the channel. Fine. More important to get through the rehearsal process and be ready for the show than to second guess every choice that is made along the way.

A few things that made the show work. First was the use of IEMs by (3) of the (4) band members. The 4th band member used hot spots which are great because they sit on a stand at chest height so they don’t have to be very loud. They also don’t reproduce a bunch of low end so there is no inherent mush involved.

There is never enough rehearsal time with the band. There is never enough time with the orchestra. How does one deal? I keep on working until I know I’ve resolve the issues I know are going to pop up. After the band and most of the orchestra left the building, a first violinist came back to practice. I politely went up on stage and said, “if you’re going to play, will you put your mic back on so I can tweak your channel?” He said sure. He probably played solo violin for 30 minutes which gave me a really good chance to walk around and listen and fine tune the EQ on his channel. A trombonist also returned and I got to work on his channel which needed some work. Lastly the harp player came back and she played for probably 30 minutes. Another rare opportunity to adjust her channel. Harps are a hard instrument to manage. They can be overly percussive at times and overly soft / dull sounding too. They can play very low in pitch and play very high in pitch. Consequently, a harp is one of the instruments I need the most time with (if I can get it). Those (3) musicians serendipitously made my job easier and made the show sound better. Thank you!

The other thing I did was spend the remaining time until dinner reconfiguring the custom layers on the Yamaha CL5 console (my favorite new console). I made a few poor decisions when building the input list which came back to haunt me. Using the custom fader layers, I was able to correct those to some degree. I was also able to setup some custom layers for a few specific songs that require some faders being close. For “Yesterday” I have (6) active channels.
Violin 1-1
Violin 2-1
Viola 1
Cello 1
acoustic guitar
Paul vocal.

I used a custom fader layer to put those channels side by side.

For Eleanor Rigby, I build a custom fader layer as follows:
V1-1
V1-2
V2-1
V2-2
Va 1
Va 2
Cello 1
Cello 2
Paul
George
Ringo
John

Custom fader layers allowed me to mix a show I didn’t really have mastered without making any major mistakes.

The Yamaha CL5 is cool in the fact that you can add channels or DCA to a custom fader layer. Very flexible. If you haven’t spent any time with a Yamaha CL or QL console, you owe it to yourself to try them both. Every console has it’s benefits and downsides. Yamaha did a good job with the CL and QL series. My only wishes would be a higher channel count (96 please instead of 72) and 24 DCA instead of 16. Seems selfish of me but that is what I need to do this gig well.

Setting levels for different measurement mics in different positions

My typical measurement rig consists of (2) Earthworks TC40K (a matched pair), my Mac laptop and a Metric Halo 2882 audio interface. Software could be either SpectraFoo Complete or Smaart 7.

On a recent gig, I put out the two mics. One about 1/3 of the way back in the house from the HL line array. I put the second mic near the FOH position to get an idea of how I would need to mix and to see how different those two positions were. I adjusted the gain on both mics to match which I realize now isn’t always the right choice. If a mic is close to a speaker and you move the mic back, you would expect to see a drop in overall level as you move further and further away from the speaker. So what? This decrease in level tells us the decrease in level between those two points. Where before I had a gain setting of 35 on the close mic, I had a gain setting of 40 on the second mic. 40 minus 35 = 5 db of SPL between the first mic and the second mic. While matching the gain of the mics allows to see the traces overlap for comparison, knowing how much the SPL drops off by the time you’re standing at FOH is equally important.

The inverse square law explains how things work.

Inverse_square_law

WIKI – Inverse Square Law

QUOTE:”In physics, an inverse-square law is any physical law stating that a specified physical quantity or intensity is inversely proportional to the square of the distance from the source of that physical quantity.”

In sound terms, this means that each time to double the distance away from the source, you 1/2 the volume. Moving from being located 1 foot away from the speaker to to 2 feet is 1/2 as loud. Moving from 2 feet away to 4 feet is 1/2 as loud again, etc… This doesn’t work exactly like this in reality because some frequencies are supported by near boundaries while other frequencies are not. So the drop in SPL with the doubling of distance is frequency dependent. Indoors, you can expect the low end to drop off slower than the mid / high frequencies.

This is why it’s better to use more speakers instead of one set of huge speakers unless you can fly them high enough to even out the distance between those up close and those far away. This is where delay rings come in.

If I were to make the same measurements again, I would make the gain for both mics equal which would reveal how much sound is being lossed by the time it arrives at FOH (back corner / under a balcony / etc…)

INSERT PHOTOS

Classical Mystery Tour – Miller Symphony Hall / Allentown PA part 2

I just finished a Classical Mystery Tour show in Allentown PA with the Allentown Symphony Orchestra. This gig was yet another reminder that without my measurement rig and more importantly the skills I have acquired to know how to use it, I would be blind. It took (8) well placed parametric EQ filters to make the EAW KF730 PA play nice with the room.

The mix position was near the back wall on the HL side of the hall. I was at least 20 to 30 feet underneath a balcony. I placed a mic at about 1/3 the distance of the room away from the stage stacked HL array. I used that mic for my “what do people hear up close to the PA” reference. I located a second mic next to FOH for my “what am I going to hear” reference.

Orange trace indicates HL array without any board EQ.
Light blue trace indicates the system response after EQ in the nearfield.
Yellow trace indicates the system response after EQ in the far field.

EAW KF 730 HL flat near far

This indicates the impulse response in the nearfield
EAW KF 730 HL impulse near

This indicates the impulse response in the farfield

EAW KF 730 HL impulse far

I used the near field mic to EQ the main PA as follows.

Band 1 – 80hz / -18 / Q 6.3
Band 2 – 100hz / -6 / Q 4.0
Band 3 – 200hz / -9 / Q 2.5
Band 4 – 300hz / -9 / Q 5.0
Band 5 – 900hz / -4 / Q 3.2
Band 6 – 1.7k / -4 / Q 4.0
Band 7 – 10k / -8 / Q 4.0
Band 8 – 14k / -6 / Q 4.0

KF730 eq 1

After finishing the EQ adjustments, I did a good bit of walking in the house to make sure that chosen EQ worked through out the venue. Things seemed relatively even and other than the expected SPL loss in the far seats.

Choosing the right speakers with your ears

A local tech school is in the market for a new PA system. Someone in the organization is leaning toward a line array. The space has 20′ ceilings (low) and is short but wide. Sometimes a line array PA is the best option. Sometimes it’s not. How does one know? There are a few well known facts about line arrays. They need to be a certain length to behave well. The number I continue to hear is 10 to 12 feet. Longer is OK but shorter is not. There is a trend to use line arrays regardless of the circumstances and this post aims to reveal why that is a bad decision to make.

Here is a model of a Meyer UPQ-1P

Here is a model of a Meyer 3 box JM1P 60 degree x 60 degree array (can be rotated in either direction with the only difference being the location of the overlap seam)

Here is a model of a Meyer 4 box Leopard line array

Here is a model of a Meyer 5 box Leopard line array

Do people use short line arrays? Absolutely. Do they sound good? Questionable. If you choose a PA system based on sound quality and you don’t need the high SPL levels a line array can provide, a pair of UPQ-1P with some front fills is the optimal PA for the space. If you look at the models, the same is true. If you neither listen or model and go based on current trends, you’re likely to have a short line array even though it doesn’t sound or behave as well and costs more.

Obviously the most important aspect of choosing a PA system is sound quality. When you can’t model the PA you are considering, I would suggest you demo the PA systems you are considering and then let your ears be the deciding factor. Not your eyes. Not your expectations of what looks impressive. Not what a sales rep suggests. Use your ears…

Meyer SIM3 pricing

I’ve always wondered what it would cost to get into a Meyer SIM3 rig and recently I decided to check into it. After all, “knowing is half the battle” as GI Joe says.

What does a Meyer Sound – SIM3 machine cost?

As of 2015, retail is $13,430…

Now add measurement microphone / microphones, VGA monitor, softrack or case, etc…

The engineers I work with who have SIM3 rigs have racks that fit inside a pelican case for transport.

Classical Mystery Tour – Miller Symphony Hall / Allentown PA part 1

Spent the morning and afternoon flying to Allentown PA for a Classical Mystery Tour show tomorrow. Fortunately the crew was already mostly set up when I arrived so tomorrow will be a much more enjoyable experience. Same day loadins, setups, sound checks, orchestra rehearsals, shows, strikes are to be avoided when ever possible.

Sound provider – Bluechip Sound.

Blue Chip Sound

The main PA consists of a (6) box per side ground stack EAW KF730 Line Array, (2) EAW subs. EAW processing. Monitoring is a mixture os IEM, EAW Microwedges and Galaxy HotSpots. (2) Yamaha CL5 consoles (FOH and monitor land), (2) RIO 3216 stage boxes for 64 x 32 inputs / outputs @ the stage. I used (2) local inputs to feed stereo music and pink noise into the system. I placed (2) Earthworks TC40K measurement mics. One on axis of the HL array about 1/3 of the way back in the house. The other on axis but next to FOH. This way I could easily compare the difference and understand whether or not my adjustments in the nearfield worked near the back of the room. FOH position was a sort of worst case scenario. Near the back wall, in a corner, under a deep balcony.

During the setup period, I was able to get a basic idea of what the system measured like without any board EQ. I was shown that the CL5 has an 8 band parametric EQ which I inserted on the stereo L/R bus. I’d already tried using the stock 4 band but couldn’t achieve what I needed to do.

The venue is an old burlesque theater built in the late 1800s. It has been renovated but the actual theater itself is mostly untouched.

The missing EQ trace

One important distinction between Meyer SIM3 and the other measurement systems I’m aware of is SIM3’s ability to display a PROCESSOR (EQ) trace at the same time it is displaying the console to microphone trace.

Meyer SIM3 - 3 traces

SIM3 refers to the (3) measurement nodes as “CONSOLE, PROCESSOR, MICROPHONE.”

Here is what Meyer has to say,

QUOTE:

“3 is the Magic Number

A capability unique to the SIM 3 audio analzer system, these three transfer functions work simultaneously to provide real-time data acquisition. The SIM 3 system starts by measuring the effects of the electronic or acoustical signal path through a comparison of two points in the signal chain, most commonly combinations of the mixing console output, equalizer or digital signal processor output, and a microphone placed in the room to capture the sound as heard by the audience. Three transfer functions using state-of-the-art, dedicated hardware and software processing make possible a slew of computations and measurements, delivering a wealth of information in both frequency and time domains.

You can select three different frequency response measurement views:

Room + Speaker – the unfiltered system response, measured by comparing the signal processor output and microphone
Processor – the signal processor and inverse processor response, measured across the processor from input to output
Result – the corrected system response, measured by comparing the processor input and microphone”

The CONSOLE to MICROPHONE trace displays the difference between what is leaving the console and what is measured by the microphone. The PROCESSOR trace provides a reference between the CONSOLE output and the PROCESSOR (EQ / DSP) output. The PROCESSOR EQ / DSP output is inverted so that when you adjust your EQ, if you create a curve that matches your console to measurement mic response, you will have created an exact opposite EQ curve. This EQ curve is called a “complimentary EQ curve”. With SIM3 you can visually see when you have achieved a “complimentary EQ curve” and the result at the microphone. This is obviously an important feature of SIM3 and has set it above the rest.

One of the things I have learned from SIM3 users is that once SIM3 has been configured using branches (preconfigured measurement nodes), one can manage large measurement projects with ease. When using SIM3 mic selector

With programs such as Smaart and SpectraFoo, you are able to see information but not at the same time. Basically with SIM3 you’re able to look at the whole picture at the same time. With other measurement apps, you must set up 2 different measurements and move between them.

Here is a diagram of what SIM3 does.

Speaker enclosures – bracing and resonance

One of the things I learned long ago is to tap on the sides of a speaker enclosure to get a sense of how well built it is. An ideal speaker would transfer 100% of the vibrations from the drivers into the air and not into the cabinet walls. Concrete would be a superior speaker enclosure material but the weight factor renders it useless except in the extreme high end HIFI realm. For most us, MDF / plywood / hardwood are going to be the materials used to build an enclosure. There are other enclosures built out of similar materials. They’re called drums. While a resonant drum is desirable, a resonant speaker enclosure is not desirable. In order to avoid speaker enclosure resonances (when the enclosure starts to resonant along with the sound it reproducing), the speaker enclosure needs to be properly braced and dampened. Expensive speakers are typically well braced and dampened. Inexpensive & lightweight enclosures typically are not well braced and dampened.

With the tap test, you can get an idea of how an enclosure will behave when it’s reproducing sound. If a speaker sounds like a drum when you tap on it, it will resonate the same way when reproducing sound which is NOT a good thing. Speaker enclosures are NOT drums and drums are NOT speaker enclosures. One requires different construction and design than the other.